

Is your Christmas tree feeling shy this year?
Ready for a glow-up that makes Santa double-check his list?
Christmas tree decoration ideas are the magic wand that turns a simple pine into a shining holiday superstar. Whether you like a sparkling disco ball vibe or cozy rustic charm, decorating your tree is like dressing your home for the holiday party. It’s fun, festive, and with the right ideas, you can create a showstopper that’ll have the whole neighborhood oohing and aaahing.
Let’s unwrap the finest Christmas tree decoration ideas that bring merry to every branch!
Why Christmas Tree Decoration Matters?
Decorating the Christmas tree is more than tradition; it’s the heart of holiday rhythm. Choosing Christmas tree decoration ideas connects generations and sparks holiday joy. The tree becomes a centerpiece celebrating togetherness and creativity.
Beautiful decorations elevate the festive spirit and create lasting memories. Thoughtful decor on the tree invites warmth, joy, and a sense of wonder, making your home truly festive and inviting.
How a Well-Decorated Tree Sets the Mood?
A stunning tree transforms the entire home into a cozy winter wonderland. It acts like the holiday heartbeat, radiating cheer from the living room to every corner. Thoughtfully chosen Christmas tree decoration ideas can reflect your style, mood, and holiday vibe, whether it’s elegant, calm, or playful energy.
Lights twinkle, ornaments gleam, and suddenly the whole space feels magical and full of life.
Trendy and Timeless Themes Overview
Popular Christmas tree decoration ideas mix timeless charm with trends. Classic themes like red and green baubles or nostalgic rustic wood harmonize beautifully with modern minimalism using metallics or vibrant colors.
Trend forecasts for 2025 lean into sparkly disco balls, mixed metals, and bright, vibrant hues, giving you stylish options alongside vintage styles. Choose your vibe and let your tree tell your holiday story.
80 Christmas Tree Decoration Ideas to Instantly Transform Your Holiday Look
➤ Classic Christmas Tree Decoration Ideas

1. Red and Gold Harmony
Tools: red balls, gold ribbons, classic bells.
How to do it: Start by placing the red ornaments across the tree so every side looks even. Add the gold ribbons in soft loops that flow down from the top to the bottom. Make sure the loops are loose and natural. Hang classic bells close to the warm lights so they catch a gentle glow. This mix creates a soft, warm charm. The red adds richness, the gold adds brightness, and together they make the tree look balanced and festive.
2. Vintage Wood Ornaments
Tools: wooden stars, wooden figurines, twine.
How to do it: Attach twine securely to each wooden ornament so they hang safely. Spread the wooden stars and figurines across the outer branches where they are easy to see. Leave small gaps between them so the tree does not look crowded. Add warm, soft lights around the ornaments to highlight their natural textures. The simple glow brings a calm, old-world feeling. The mix of wood and light creates a peaceful, rustic theme that feels cozy and timeless.
3. Classic Candy Cane Style
Tools: candy canes, red bows, white string.
How to do it: Hook the candy canes evenly around the tree so every side looks colorful and sweet. Place the red bows in the empty spaces between branches to add softness. Make small loops with the white string and hang them lightly to fill tiny gaps. Keep the decorations at different heights so the tree looks lively. The mix of red, white, and candy stripes brings cheerful energy. This classic style makes the tree feel fun, bright, and perfect for families.
4. Snow-Touched Branches
Tools: artificial snow, soft brush, silver balls.
How to do it: Use a soft brush to gently apply artificial snow on the tips of the branches. Focus on the outer edges to make the snow look light and natural. After the snow dries, place silver balls close to the frosted areas so they shine against the white surface. Keep the decorations simple to maintain the winter forest look. The combination of soft snow and silver adds a peaceful, fresh feeling, making the tree look like it came straight from a snowy landscape.
5. Red Ribbon Swirl
Tools: wide red ribbon, small clips.
How to do it: Take a wide red ribbon and wrap it around the tree in smooth spiral lines, starting near the top and moving downward. Keep the ribbon slightly loose, so it flows gently. Use small clips to secure the ribbon without showing the clips. Add matching red ornaments between the ribbon lines to keep the color theme strong. This technique gives the tree a bold but tidy look. The even swirl pattern makes the whole tree appear clean, bright, and eye-catching.
6. Bell-Focused Tree
Tools: bells in different sizes, thread.
How to do it: Hang bells in different sizes across the tree so they sit at different heights. This creates movement and a gentle sound when the tree is touched or air flows. Place warm lights behind or near the bells to make them glow softly. Keep the rest of the decorations simple so the bells stay the highlight. This setup gives the tree a nostalgic feeling. The soft jingles and warm light create a peaceful, old-fashioned charm that feels classic and comforting.

52 DIY Christmas ornament ideas that are easy to make
Hurry because Christmas is near and we have to prepare Unique Christmas gifts, Christmas decorations, and DIY Christmas ornament ideas to decorate Christmas trees.
7. Classic Star Touches
Tools: metal stars, string, warm lights.
How to do it: Hang the metal stars close to warm lights so each star reflects a soft, golden shine. Spread them evenly across the branches so every part of the tree sparkles. Mix small and medium stars for balance, but avoid placing too many in one area. Add lights behind thicker branches to brighten the stars even more. This creates a gentle glow that feels magical. The simple star theme adds elegance while keeping the tree classic and easy to decorate.
8. Heirloom Ornament Mix
Tools: old family ornaments, soft hooks.
How to do it: Place the heirloom ornaments at eye level so they stand out the moment someone looks at the tree. Use soft hooks to avoid damage. Surround these special pieces with plain ornaments that do not steal the spotlight. Keep the arrangement light so each heirloom has space to shine. Add warm lights behind them for a soft glow. This helps draw attention to the memories and stories they carry. The tree becomes personal, meaningful, and full of family history.
➤ Modern Christmas Tree Decoration Ideas
9. Black and White Minimal Style
Tools: matte black balls, white ribbons.
How to do it: Keep the entire tree clean and open by placing ornaments with enough space between them. Start by hanging matte black balls evenly across the branches, then add white ribbons in soft, balanced lines. Avoid using too many pieces because minimal style works best with fewer items. Add bright white lights to create a sharp contrast that highlights both colors. This simple setup keeps the tree crisp, modern, and calm without feeling cluttered or heavy.
10. Geometric Ornament Mix
Tools: hexagon or cube ornaments.
How to do it: Begin by picking different geometric shapes like hexagons, cubes, or triangles in solid colors. Hang each shape at different levels on the tree to create movement and keep the look interesting. Use thin silver strings so the shapes appear to “float” instead of hanging visibly. Leave enough space between each ornament so the structure of the shapes stands out clearly. This mix gives the tree a bold, modern feel without adding too many decorations.
11. Mirror-Finish Balls
Tools: mirror balls, clear hooks.
How to do it: Place the mirror-finish balls around the brightest parts of your tree to create a glowing effect. Use clear hooks so the ornaments look clean and seamless. Spread them across the front, but avoid packing them too closely to prevent overwhelming reflections. Add a few near the lights to bounce shine across the branches. This simple placement keeps the tree looking glossy, bright, and modern, without using too many additional decorations.
12. Metallic Ribbon Flow
Tools: rose-gold ribbons, silver accents.
How to do it: Start by choosing rose-gold or silver ribbons that match the rest of your décor. Layer the ribbons gently in wave-like patterns from top to bottom, making sure they flow smoothly around the tree. Add a few ornaments in similar metallic shades to complete the look. Avoid using strong or dark colors so the soft metallic shine stays visible. This method gives your Christmas tree a fresh, stylish look with a balanced shimmer.
13. Frosted Glass Style
Tools: frosted glass balls.
How to do it: Hang frosted glass balls evenly around the tree, especially near the brighter light spots. The gentle glow from the lights shines through the frosted surface and creates a soft, icy charm. Use simple hooks so the ornaments stand out. Keep the color palette light, whites, silvers, or pale blues, to maintain a winter feel. Avoid overcrowding the branches, as the beauty of frosted glass looks best when each piece has space to glow.
14. Single-Color Tree
Tools: one color ornaments only.
How to do it: Pick one main color, white, gold, silver, red, or blue, and follow it for every ornament. Hang the ornaments from top to bottom in a balanced way, keeping the shades consistent. Add matching lights, such as warm lights for gold or cool lights for blue. Avoid mixing in extra colors to maintain a clean, modern look. This style works well when you vary the sizes and textures of ornaments, keeping the tree simple but striking.
15. Neon Pop Look
Tools: neon ornaments.
How to do it: Choose neon ornaments in bright shades like pink, orange, green, or yellow. Place them in areas where the tree feels darker, so the colors pop immediately. Add small white or warm lights to highlight the neon glow without overpowering it. Keep other decorations simple to avoid visual overload. Use bold placements at the front of the tree for a fun, energetic look that stands out in any room.
16. Clear-Only Theme
Tools: clear ornaments.
How to do it: Start with clear ornaments in different shapes and sizes. Hang them close to light sources so the tree lights shine through and create a soft, glowing effect. Use transparent hooks for a clean and airy look. Avoid adding color; this theme works best when the tree looks simple and modern. Spread the ornaments evenly to keep the design balanced. The final style feels light, elegant, and very fresh.
➤ Budget-Friendly Christmas Tree Decoration Ideas

17. Paper Stars
Tools: paper sheets, scissors, twine
How to do it: Cut several star shapes from any paper you already have at home, old notebooks, magazines, or craft paper, all work. Punch a small hole at the top of each star and thread twine through it. Hang these stars across different branches so they spread evenly. Add warm string lights around them to highlight the shapes. This simple craft gives your tree a soft, homemade charm without spending much money, yet still looks warm and inviting.
18. Popcorn Strings
Tools: popcorn, thread, needle.
How to do it: Pop a fresh batch of popcorn and let it cool completely. Take a needle and thread, then start sliding each popcorn piece one by one to form a long garland. Make a few strands so your tree looks fuller. Wrap the garlands around the tree from top to bottom. Add small red ribbons or tiny bows between sections for a pop of color. This decoration is cheap, cheerful, and brings a classic old-school Christmas feel to your tree.
19. Scrap Fabric Bows
Tools: leftover fabric, scissors.
How to do it: Collect leftover pieces of fabric from old shirts, dresses, or scarves. Cut them into equal-length strips so the bows look neat and balanced. Tie each strip into a simple bow by pulling both ends gently. Clip or tie the bows onto different branches to add color and texture. Spread them out so the tree looks even. This idea uses items you already have and adds a soft, cozy look without any extra cost.
Read More:
- 15 Heartfelt Christmas Gift Ideas for Best Friends Designed to Celebrate Friendship in Meaningful Ways
- You’ll Want Hot Cocoa for These! Top Christmas Movies to Watch for Every Mood This Holiday Season
20. Cardboard Ornaments
Tools: cardboard, markers.
How to do it: Take a piece of cardboard from a leftover box and cut out shapes like stars, circles, or tiny bells. Use markers or crayons to add small drawings, patterns, or outlines. Punch a hole at the top of each shape and loop a thread through it for hanging. When placed on the tree, these ornaments look simple yet artistic. The flat cardboard surface reflects light nicely, making the decorations shine without needing fancy materials.
21. Dried Orange Rings
Tools: oranges, oven, thread.
How to do it: Slice a few oranges into thin, even pieces. Spread them on a tray and dry them in the oven on low heat until the slices turn firm. Once cooled, run a thread through each slice to create natural ornaments. Hang them evenly around the tree so the warm orange color stands out. These dried rings add a gentle citrus scent and a cozy golden glow that feels festive, natural, and budget-friendly.
22. Ribbon Leftover Tree
Tools: ribbon scraps, clips
How to do it: Gather old ribbon scraps from gift boxes, clothing, or past holiday decorations. Cut them into small pieces and twist or tie them into tiny loops. Clip or tie these loops onto empty branches to fill gaps and add color. Use different shades and textures for a playful mix. This method quickly fills the tree, makes it look fuller, and saves money by using leftovers instead of buying new décor.
23. DIY Pinecone Decor
Tools: pinecones, white paint.
How to do it: Collect pinecones from your yard or buy a small pack. Brush white paint on the tips to create a frosted snow effect. Let them dry completely. Attach a thread or small hook to the top and hang them across the tree. These pinecones bring a natural, woodland feel and make the tree look warm and cozy. They blend beautifully with lights and other DIY decorations while costing almost nothing.
24. Paper Snowflakes
Tools: white paper, scissors.
How to do it: Fold a piece of white paper several times and cut small shapes along the edges to form snowflakes. Open them gently to reveal the patterns. Make snowflakes in different sizes for variety. Hang them near the tree’s lights so they create soft, pretty shadows at night. This simple craft looks magical, fills space nicely, and brings a classic winter feel, all without spending anything.
➤ Luxury Christmas Tree Decoration Ideas

25. Crystal Drop Ornaments
Tools: glass drops, silver hooks.
How to do it: To decorate with crystal drops, start by placing them near the tree’s light strings so they catch and reflect the glow. Hang each drop at different heights to create gentle movement when the tree shifts. Keep enough space between them so they don’t look crowded. Add a few toward the inner branches for depth. When the lights shine through, the tree feels rich, calm, and sparkling without looking too heavy or bright.
26. Velvet Ribbon Flow
Tools: velvet ribbon, small clips.
How to do it: Begin by cutting long strips of velvet ribbon so they drape smoothly from top to bottom. Wrap the ribbon around the tree in soft waves instead of tight loops. Use small clips to secure the ribbon behind branches so the clips stay hidden. Keep the waves even to create a clean flow. Velvet adds a warm, royal look, so you don’t need too many ornaments. The ribbon itself becomes the key highlight of your tree.
27. Pearl Strings
Tools: fake pearl strands.
How to do it: Drape the pearl strings loosely around the tree, starting from the top and working your way down. Keep a gentle curve in each section so the pearls rest naturally on the branches. Avoid pulling them tight; the relaxed look feels more elegant. Maintain even spacing between each loop so the tree looks neat and balanced. Combine pearls with soft white lights for a calm, classy glow. The final look feels delicate and timeless.
28. Gold Leaf Balls
Tools: gold-leaf ornaments.
How to do it: Place gold-leaf balls at eye level so they immediately catch attention when someone walks into the room. Spread them evenly around the tree for a bold yet balanced shine. Add warm white lights behind or near each ball to bring out the gold tones. Mix a few larger and smaller pieces to create depth. Avoid placing them too close together to keep the look sophisticated. This simple setup turns the tree into a rich, glowing centerpiece.
29. Glass Bird Figurines
Tools: glass birds, soft hooks.
How to do it: Choose a few glass bird figurines and hang them gently on the outer branches using soft hooks. Place them where light can touch their wings to create a soft shimmer. Keep enough space around each bird so they stand out on their own. Add a small cluster of warm lights nearby to highlight their shape. Spread the birds evenly instead of grouping them. This gives the tree a graceful, airy feel without overwhelming the design.
30. Luxury Metallic Mix
Tools: chrome silver, rose-gold ornaments.
How to do it: Use a mix of chrome, silver, and rose-gold ornaments to give your tree a modern luxury look. Start by placing one metallic shade at a time so the colors stay balanced. Spread them evenly from top to bottom, keeping the mix consistent on all sides. Avoid crowding these shiny pieces, as too many in one spot can look messy. Add soft, warm lights to bring out the contrast between both metals. The final look feels rich and perfectly balanced.
➤ Theme-Based Christmas Tree Decoration Ideas
31. Winter Wonderland Theme
Tools: white ornaments, snow spray.
How to do it: Start by hanging all the white ornaments to build a clean base. Lightly spray artificial snow on the outer branches so the tree looks frosted. Add silver ribbons or bows to bring shine without overpowering the snowy look. Keep the lights soft and cool-toned for a winter feel. This setup creates a calm, magical mood that looks like a snowy forest inside your home.
32. Candy Shop Theme
Tools: faux candies, striped ribbons.
How to do it: Begin with pastel-colored ornaments to create a bright base. Add faux candy sticks, swirls, and lollipops all around the tree to give it a fun and sugary look. Use striped red-and-white ribbons to bring a classic candy style. Keep the colors bold and cheerful. This theme works great for kids and creates a sweet, playful atmosphere that instantly lifts the room’s mood.
33. Rustic Cabin Theme
Tools: burlap ribbon, wood shapes.
How to do it: Use warm, earthy ornaments to set a cozy tone. Wrap the tree with burlap ribbon for a natural feel. Add wooden shapes like stars, trees, or animals to enhance the rustic charm. Choose warm yellow lights to soften the look and make the tree feel like a cozy winter cabin. Keep everything simple and avoid shiny items. This theme brings warmth and nature indoors.
34. Ocean Blue Theme
Tools: blue shells, aqua ribbons.
How to do it: Start with blue and aqua ornaments to build a fresh ocean color palette. Hang shell or starfish decorations evenly around the tree. Use cool-toned lights to highlight the blue shades and create a calm, water-inspired glow. Add a few silver ribbons for shine. This theme makes the tree look peaceful, refreshing, and perfect for people who love beach or coastal décor.
35. Farmhouse Style Theme
Tools: cotton stems, wood beads.
How to do it: Place cotton stems throughout the tree to add a soft, natural texture. Wrap wood-bead garlands from top to bottom to create a warm, homely look. Add neutral ornaments in beige, white, or light brown to keep the theme consistent. Choose warm lights to make the tree feel inviting. This style brings a calm, country charm that fits perfectly in cozy homes.
36. Storybook Theme
Tools: mini books, character figurines.
How to do it: Hang mini books or small pages from classic stories around the tree. Add character figurines like fairies, animals, or heroes to make it feel alive. Use soft lights to highlight the details without overpowering the decorations. Place playful ribbons or colorful ornaments to keep the theme fun. This style sparks imagination and is perfect for kids who love stories and fantasy.
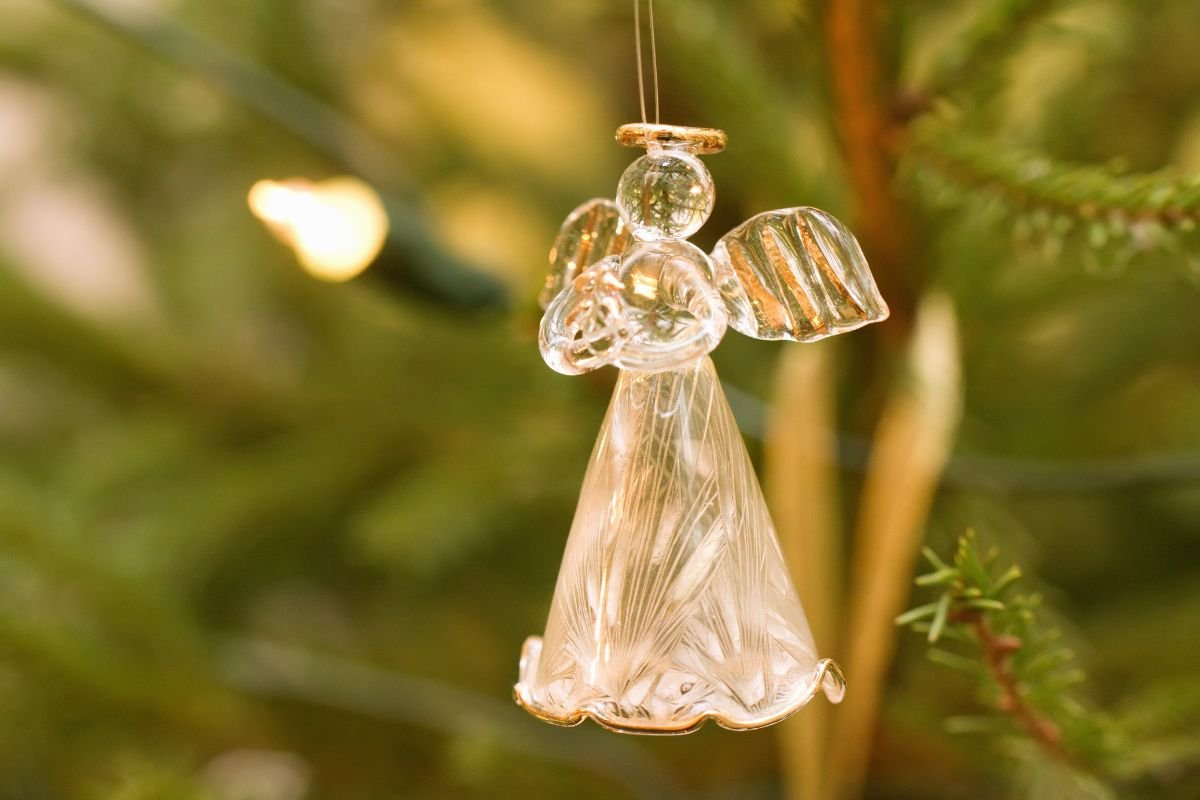
37. Angel Theme
Tools: angel figurines, soft white lights.
How to do it: Place angel figurines near the top and middle areas where light hits beautifully. Use soft white or warm lights to create a peaceful glow. Add white or gold ribbons to enhance the gentle theme. Keep the ornaments light-colored and simple to maintain a calm feel. This decoration style brings purity, comfort, and a serene holiday atmosphere to your home.
38. Pet Theme
Tools: pet-shaped ornaments.
How to do it: Decorate the tree with pet-shaped ornaments like dogs, cats, or paw prints. Place most of these decorations lower on the tree so kids and guests can enjoy them easily. Add colorful ribbons or small frames with pet photos for a personal touch. Choose sturdy, shatter-proof items to keep them safe for real pets. This fun theme celebrates the animals you love.
➤ Space-Saving Christmas Tree Decoration Ideas
39. Wall-Hanging Tree
Tools: wood planks, nails.
How to do it: Start by laying out wooden planks on the floor in a triangle shape to mimic a Christmas tree. Fix them together using nails. Mount the finished shape on the wall at your preferred height. Add small ornaments, mini lights, or ribbons to decorate it. This design keeps your floor open while giving the room a festive touch. It is great for apartments or small rooms where every inch of space matters.
40. Half-Tree Design
Tools: flat-back tree.
How to do it: Place the flat-back Christmas tree directly against a wall so only the visible front part needs decorating. Add lights, ribbons, and ornaments only on the front side, which saves time and space. This idea works well in hallways, small bedrooms, or compact living rooms. It gives you the full festive look without taking up the space of a full tree. It is an easy and smart way to decorate small homes.
41. Corner Tree
Tools: slim tree.
How to do it: Set a slim Christmas tree in the tightest corner of your room. Once placed, decorate it with tall ornaments or long vertical ribbons to make the tree appear taller. Use lightweight décor so the tree doesn’t look crowded. Add lights mainly on the front side to save effort. This setup uses unused corner space and still keeps the room open for movement, perfect for tiny homes or studio apartments.
42. Window Frame Tree
Tools: thin branches.
How to do it: Collect thin branches and trim them into different lengths. Tie them together inside a window frame, arranging them from longest at the bottom to shortest at the top to form a tree shape. Add small ornaments, mini stars, or light wooden pieces. Hang a string light around the frame to highlight the outline. This design brings a natural, airy look and saves floor space completely, making it ideal for tight rooms.
43. Tabletop Mini Tree
Tools: mini stand, small balls.
How to do it: Place a small Christmas tree on a table, shelf, or cabinet. Add tiny ornaments like mini balls, bows, stars, and soft LED lights. Choose lightweight décor so the tree doesn’t tip over. You can also add a small fabric skirt or a basket under it for a cute look. This option is perfect for desks, bedside tables, and small entryways where a full tree won’t fit. It adds instant festive charm.
44. Floating Shelf Tree
Tools: shelves, decor pieces.
How to do it: Arrange your floating shelves in a vertical triangle layout or keep them as they are and place decor pieces in a tree-like pattern. Add ornaments, mini houses, candles, or greenery on each shelf. Run a string light along the edges to highlight the shape. This idea lets you decorate using items you already own while saving floor space completely. It works especially well in modern rooms or small apartments.
45. Slim Pencil Tree
Tools: pencil, tree stand.
How to do it: Put up a pencil-style tree, which is tall and thin, and perfect for narrow spaces. Decorate it lightly so the slim shape looks neat. Add long vertical ribbons from top to bottom to make the tree appear taller. Use small ornaments to keep it balanced. Add lights running upward to highlight its height. This tree fits in corners, beside sofas, or near doorways without taking up much room.
46. Ladder Tree
Tools: small ladder, lights.
How to do it: Set up a small ladder and open it fully. Wrap a string light around the sides to outline the shape. Hang ornaments, ribbons, or small décor pieces on each step to create a layered tree look. Add a star on top if the ladder allows. This creative idea uses a common household item and turns it into a unique Christmas display. It works well in small rooms and adds a rustic charm.
➤ Eco-Friendly Christmas Tree Decoration Ideas
47. Recycled Paper Ornaments
Tools: old newspapers.
How to do it: To make recycled paper ornaments, start by cutting old newspaper into long strips. Roll each strip tightly to form circles, stars, or teardrop shapes. Secure the ends with glue so the shape stays firm. Make a small hole at the top or glue a loop of twine for hanging. You can layer multiple rolled pieces to create thicker ornaments. Once ready, hang them near warm lights to give a soft, natural glow that feels eco-friendly and handmade.
48. Natural Twig Stars
Tools: twigs, glue.
How to do it: Collect small, straight twigs and trim them to equal lengths. Arrange five twigs into a star shape and glue the corners where they meet. Hold each corner for a few seconds until the glue sets. Once the star feels stable, add a small jute loop at the top for hanging. You can leave the twigs natural or lightly brush them with white paint for a snowy look. Hang these stars on the tree for a warm, rustic, eco-friendly style.
49. Clay Shapes
Tools: air-dry clay.
How to do it: Flatten a small piece of air-dry clay using your hands or a rolling pin. Use simple cutters like stars, hearts, or circles to make shapes. Create a small hole at the top with a toothpick for hanging later. Let the clay pieces dry completely, which usually takes a few hours. Once dry, you can leave them plain or paint them lightly for a soft color. Add a simple thread or jute loop, then hang the ornaments for a clean, natural look.
50. Cinnamon Stick Bundles
Tools: cinnamon sticks.
How to do it: Take three cinnamon sticks and arrange them in a small bundle. Tie them together in the middle using jute, twine, or thin ribbon. Make sure the knot is tight so the sticks stay in place. Add a small loop at the top if you plan to hang it. You can also tuck these bundles between branches instead of hanging. Their warm scent spreads gently through the tree, giving your home a cozy, natural, and eco-friendly holiday feel.
51. Leaf Cutouts
Tools: cardboard, paint.
How to do it: Draw leaf shapes on cardboard using a pencil. Cut them out carefully with scissors. Paint the leaves in simple shades of green, gold, or white, depending on your theme. Once the paint dries, punch a small hole at the top. Thread twine or jute through the hole to create a hanging loop. These cardboard leaves look simple, stylish, and natural. They blend well with rustic décor and are a great eco-friendly alternative to plastic ornaments.
52. Burlap Ribbon
Tools: burlap strips.
How to do it: Cut long strips of burlap and smooth the edges if needed. Start at the top of the tree and wrap the burlap loosely around it, moving downward in gentle waves. Avoid pulling too tightly so the natural texture stays soft and relaxed. You can tuck the ends between branches to secure them. Burlap adds instant warmth, a rustic charm, and an eco-friendly feel. It pairs well with natural ornaments like pinecones, wood pieces, and twig stars.
53. Cotton Rounds Snowballs
Tools: cotton pads.
How to do it: Take two cotton pads and glue them lightly along the edges to form a soft, fluffy snowball. Press gently so they stick without losing shape. Make several pieces using the same method. Add a small loop of thread at the top if you want to hang them. These snowballs look soft and bright on the tree and add a wintery touch. They’re safe for kids, budget-friendly, and a perfect eco-friendly option for simple Christmas decorating.
54. Natural Pine Branch Mix
Tools: real pine sprigs.
How to do it: Collect a few fresh pine sprigs and trim them to a size that fits your tree. Slide the sprigs between the artificial branches to make the tree look fuller and more natural. Spread them evenly from top to bottom. Their natural scent gives your tree a fresh holiday smell without using chemicals. You can also mix pine sprigs with small berries or twine bows. This simple method instantly boosts the tree’s beauty while keeping your décor eco-friendly.
➤ Christmas Tree Decoration Ideas for Kids
.jpg)
55. Cartoon Characters
Tools: character ornaments.
How to do it: Pick cartoon ornaments based on the characters your kids love the most. Hang these ornaments at their height so they can see and enjoy them easily. Spread the characters around the tree to make it look playful and colorful. You can mix big and small character pieces to keep the design fun. Let kids help place their favorites, which makes decorating more exciting for them.
56. Soft Plush Decor
Tools: plush mini toys.
How to do it: Choose small plush toys that are soft and safe for kids. Clip or tie them gently to the branches so they stay secure without falling. Mix different animals, shapes, or characters to keep the tree lively. Because the toys are soft, kids can touch and play with them safely. This makes the tree interactive and inviting. Place plush toys at eye level for kids to enjoy easily.
57. Felt Shapes
Tools: felt sheets.
How to do it: Cut out simple felt shapes like stars, hearts, trees, or cute animals. Add small loops using thread or ribbon so they can hang easily. Felt is light, so the ornaments won’t bend the branches. Mix different colors to make the tree bright and cheerful. Kids can even help cut the shapes if supervised. Spread the felt ornaments evenly around the tree for a neat, soft, and kid-focused look.
58. Color Burst Balls
Tools: bright balls.
How to do it: Pick bright, bold-colored plastic balls that stand out on the tree. Mix colors like red, yellow, blue, green, and pink to create a fun, cheerful theme. Hang them in different spots to keep the tree visually balanced. Avoid placing too many of the same color in one area. Choose shatter-proof balls so kids can touch them safely. The bright mix gives the tree a lively and energetic feel.
59. DIY Sticker Ornaments
Tools: stickers, cardboard.
How to do it: Let kids choose their favorite stickers and stick them on pieces of cardboard. Cut the cardboard into circles, stars, or simple shapes. Add a small hole and tie a thread loop so you can hang them easily. Kids will enjoy making their own ornaments, and each one will feel personal and fun. Spread the sticker ornaments around the tree to display their creativity. This idea is inexpensive and interactive.
60. Name Tags
Tools: cardboard, markers.
How to do it: Cut small pieces of cardboard into rectangles, circles, or fun shapes. Ask each child to write their name using markers or decorate the tag with small drawings. Punch a hole at the top and add a string loop. Hang each name tag in its own spot on the tree. Kids love finding their names, which makes the decoration feel personal. This idea also helps them feel included and proud of the tree.
61. Activity Ornaments
Tools: tiny puzzles.
How to do it: Choose tiny puzzle pieces or mini activity items that are light enough to hang. Place each piece on a hook or tie a small string to attach it to the tree. Kids can enjoy taking them off, solving the mini puzzle, and placing them back. Spread the pieces around the tree so they feel like a fun treasure hunt. This makes the tree interactive and keeps kids entertained while decorating.
62. Glow-in-the-Dark Stars
Tools: glow stars.
How to do it: Use glow-in-the-dark stars that are lightweight and easy to hang. Before placing them on the tree, hold them under a bright light for a few minutes to “charge” the glow. Hang them in different spots so the tree lights up softly in the dark. Kids will enjoy watching the stars glow at night. Mix different sizes for a magical look. This idea adds a fun nighttime effect to the tree.
➤ Christmas Tree Lighting Ideas
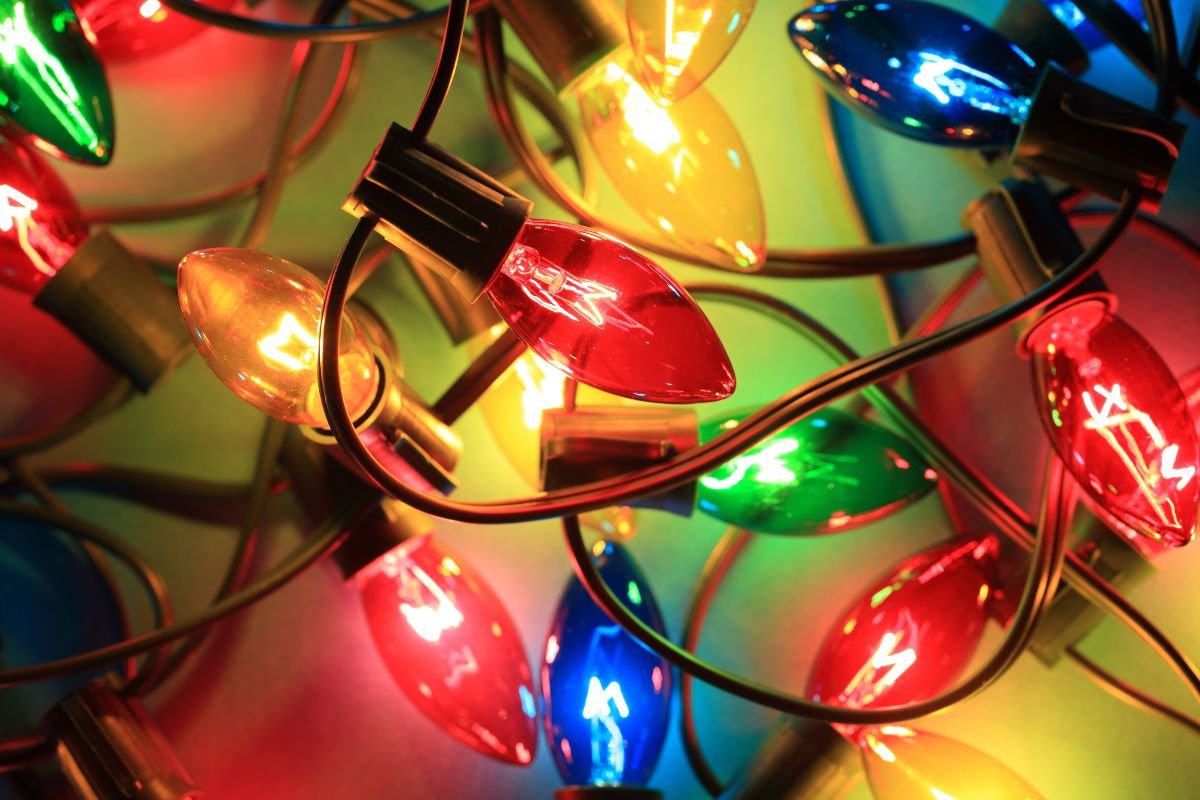
63. Warm White Strings
Tools: warm white LEDs.
How to do it: Start by placing the warm white LED lights deep inside the tree. Begin at the trunk and slowly work your way outward so the light spreads evenly. Wrap the lights around each layer of branches instead of just placing them on top. This helps the tree glow from the inside and gives it a soft, warm look. Continue wrapping until you reach the outer edges, keeping the spacing even for a balanced shine.
64. Twinkle Pattern Lights
Tools: twinkle LEDs.
How to do it: Add the twinkle LED lights to the middle layer of your tree. This layer is important because it helps the twinkling effect look natural and not too bright. Place the lights in gentle curves around the branches, making sure they sit between the inner and outer layers. This creates a sparkling look that feels calm and festive. Keep the lights evenly spaced so the twinkle pattern spreads softly across the whole tree.
65. Color-Changing Lights
Tools: RGB lights.
How to do it: Start by placing the RGB lights around the tree in wide loops so the colors spread evenly. After positioning them, switch the lights to the slow-fade mode. This mode changes colors smoothly and gives your tree a calm, modern look. Make sure the lights are not too close together to avoid harsh brightness. Spread them across different layers so the color change appears balanced and soothing from every angle.
66. Fairy Light Net
Tools: light net.
How to do it: Place the fairy light net gently over the tree like a blanket. Let it fall naturally on the branches so it blends in nicely. Adjust the net by tucking small sections into the branches for a clean look. The goal is to spread the lights evenly without gaps. Smooth the net downward so each row of lights sits neatly. This gives your tree a soft, magical glow with very little effort.
67. Hidden Lights in Deep Branches
Tools: mini LEDs.
How to do it: Use mini LEDs and start by pushing them into the deeper parts of the branches. The goal is to create a soft inner glow that shines through the outer ornaments. Place the lights behind thicker branches so they stay hidden but still give off a warm shine. Work your way around the entire tree, keeping the lights evenly spaced. This method makes the tree look fuller and more elegant without showing visible wires.
68. Spiral Light Wrap
Tools: long string.
How to do it: Begin at the top of the tree and secure the end of the long light string near the tree topper. Then slowly wrap the lights downward in a spiral pattern. Keep the spacing even as you move toward the bottom. Let the lights rest lightly on the branches instead of pulling them tight. This creates a clean, flowing look that covers the whole tree beautifully. Finish by tucking the wire end behind a branch.
69. Spotlight from Floor
Tools: small spotlight.
How to do it: Place a small spotlight on the floor a few inches away from the tree base. Point the light upward so it highlights the center and top of the tree. Adjust the angle until the light spreads evenly without creating harsh shadows. Choose a warm tone for a cozy look. This spotlight method adds depth, makes ornaments shine brighter, and gives your tree a beautiful stage-like glow. It’s simple but adds a strong visual impact.
70. Lantern Pairs
Tools: mini lanterns.
How to do it: Place two mini lanterns near the tree trunk, one on each side, to create a warm central glow. Position them slightly inside the branches so the light spreads softly outward. Keep the lanterns low and close to the base for a grounded look. Make sure they sit safely and steadily. This setup adds charm and makes the tree look more inviting. The paired lights also highlight the inner decorations and balance the overall lighting.
➤ Tree Topper Ideas

71. Classic Star Topper
Tools: metal star.
How to do it: To set up a classic star topper, start by checking that your tree’s top branch is straight and firm. Slide the metal star onto the branch or attach it using a small wire for a better grip. Adjust it until the star faces the front and stays balanced. Make sure the topper sits tightly so it doesn’t lean or fall. Step back and look at the tree from different angles to confirm it looks centered and secure.
72. Angel Topper
Tools: fabric angel.
How to do it: Begin by shaping your tree’s top branch so it can support the angel topper. Gently place the fabric angel on the highest point and make sure it sits evenly. If the topper feels loose, use a small piece of clear tape or a thin wire behind it to hold it in place. Adjust the angel’s dress or wings so they spread nicely. Keep the look soft and natural so the angel appears like it’s floating gracefully.
73. Bow Topper
Tools: wide ribbon.
How to do it: Cut a long piece of wide ribbon and tie a big, full bow that suits your tree’s color theme. Shape the loops to make them look fluffy and even. Attach the bow to the top branch with floral wire or ribbon ties. Let the bow tails fall down the tree for a pretty cascading look. Adjust the ribbon ends so they curve gently. Make sure the bow is tight enough to stay in place all season.
74. Snowflake Topper
Tools: large snowflake.
How to do it: Choose a large snowflake topper that complements your tree’s theme. Place it on the top branch and tilt it slightly for a stylish winter look. Use a thin wire to wrap the center of the snowflake to the branch for extra support. Make sure it faces the front and sits evenly. Step back and adjust the angle until it looks perfect. The light tilt helps the snowflake catch lights and gives your tree a gentle, frosty charm.
75. Crown Topper
Tools: mini crown.
How to do it: Place the mini crown gently on the top branch, making sure the branch sits inside the crown for balance. Add small string lights behind or beneath the crown to create a glowing effect. Secure the crown with transparent wire if it feels loose. Adjust the crown so it points straight up and looks regal. The added lighting highlights the crown’s shape and gives your tree a grand, elegant finish that stands out beautifully.
76. Rustic Branch Topper
Tools: branches.
How to do it: Collect a few thin, strong branches of equal length. Arrange them into a simple star shape and tie the joints with twine for a rustic look. Place the finished star on the top branch of your tree and secure it with twine or wire. Adjust the star so it sits straight and is visible from the front. This natural topper looks warm and handmade, adding a cozy, woodland charm to your Christmas tree without extra cost.
77. Globe Light Topper
Tools: light ball.
How to do it: Choose a small light-up globe and set it to a soft glow mode. Place it on the top branch, making sure the branch fits firmly inside the globe’s base. Use a thin wire to secure it if needed. Spread your tree lights around it so the glow blends evenly. Adjust the brightness if the topper has settings. This simple globe adds a warm, modern shine that makes your tree look bright without being too flashy.
78. Halo Ring Topper
Tools: circular LED ring.
How to do it: Take a circular LED ring and check the lighting mode you want; soft golden light works best for a glowing halo. Place the ring on the top branch and secure it with clear wire so it stays steady. Make sure the ring sits slightly above the branch, creating a floating effect. Switch on the lights and adjust the angle so the ring shines naturally. This topper gives your tree a clean, angelic, and modern look.
➤ Christmas Tree Skirt & Base Decoration Ideas
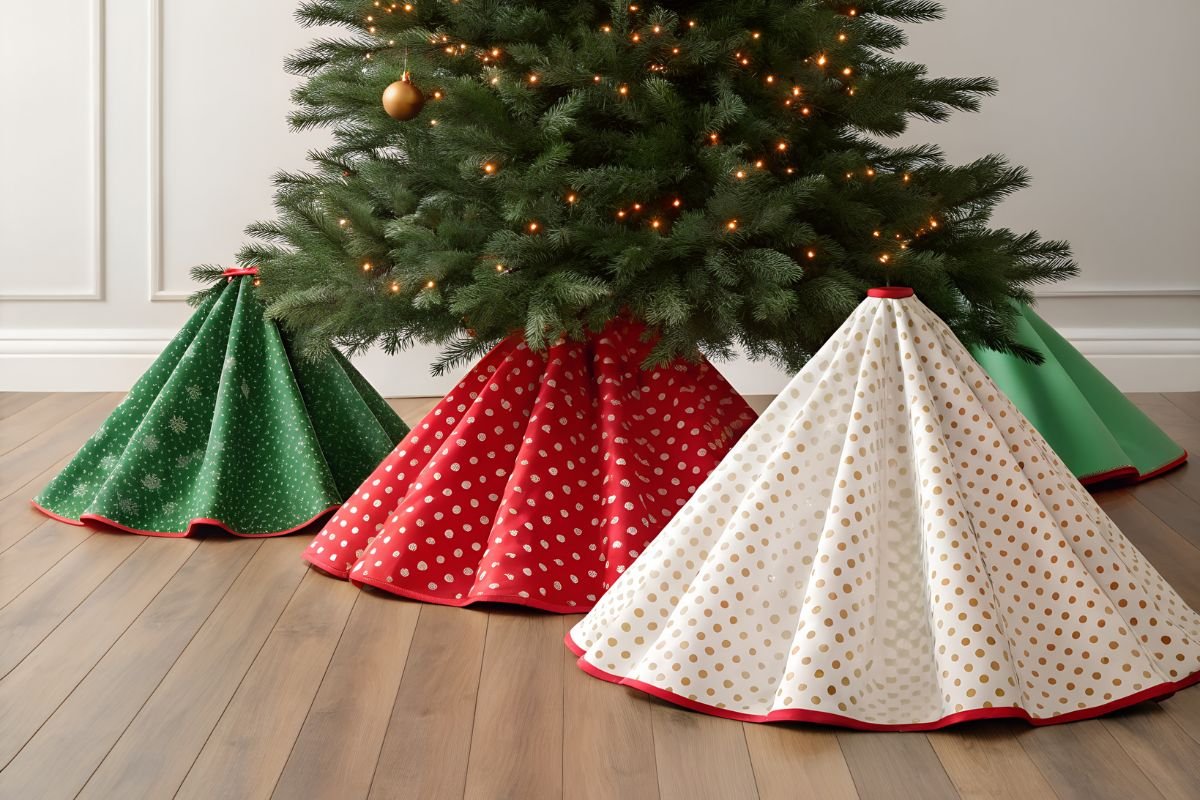
79. Faux Fur Skirt
Tools: fur cloth.
How to do it: Lay the faux fur cloth around the bottom of the tree, covering the stand completely. Smooth the edges so the fabric spreads evenly in a circle. Adjust the fur to create a soft, snowy effect that matches your décor. If the tree is already decorated, gently lift the branches while placing the skirt to avoid damage. Keep the fur clean by shaking off dust when needed. This simple skirt instantly adds warmth and a cozy winter feel.
80. Wooden Crate Base
Tools: crate.
How to do it: Place your tree stand inside a wooden crate that fits well and keeps the tree stable. Make sure the stand is centered so the tree stands straight. Fill the extra space around the stand with soft cloth or paper for support. Add warm string lights around the crate to create a glowing base. You can also place small ornaments or pinecones on the crate edge. This base gives your tree a rustic, farmhouse-style charm that feels warm and inviting.
How to Maintain Your Decorated Tree?
A decorated tree needs gentle care to stay fresh through the season. Keep the room well-ventilated so the lights do not overheat the branches. Fluff branches often to keep the shape neat. Adjust ribbons or bows that slip. Check light wires for any loose spots. Clean glass ornaments with a soft cloth so they stay bright. These small steps keep your Christmas tree looking alive and polished. Use these Christmas tree decoration ideas smartly, and your tree keeps its charm till the last holiday night.
Facts and Stats Related to Christmas Trees
- The U.S. sells over 25-30 million real Christmas trees each year.
- The average family spends $997.73 on ornaments each season.
Conclusion
Your Christmas tree is the festive heartbeat of the home, sparkling brightest with the right Christmas tree decoration ideas. From classic charm to bold modernity, a beautifully decorated tree lifts spirits and invites joy.
This season, give your tree the star treatment it deserves. Make each ornament count, light it up with care, and watch your home transform into a holiday haven full of warmth, laughter, and the magic only Christmas can bring. Merry decorating!
Thanks for Reading!
See More
Creative Office Christmas Party Themes That Boost Team Spirit and Productivity