
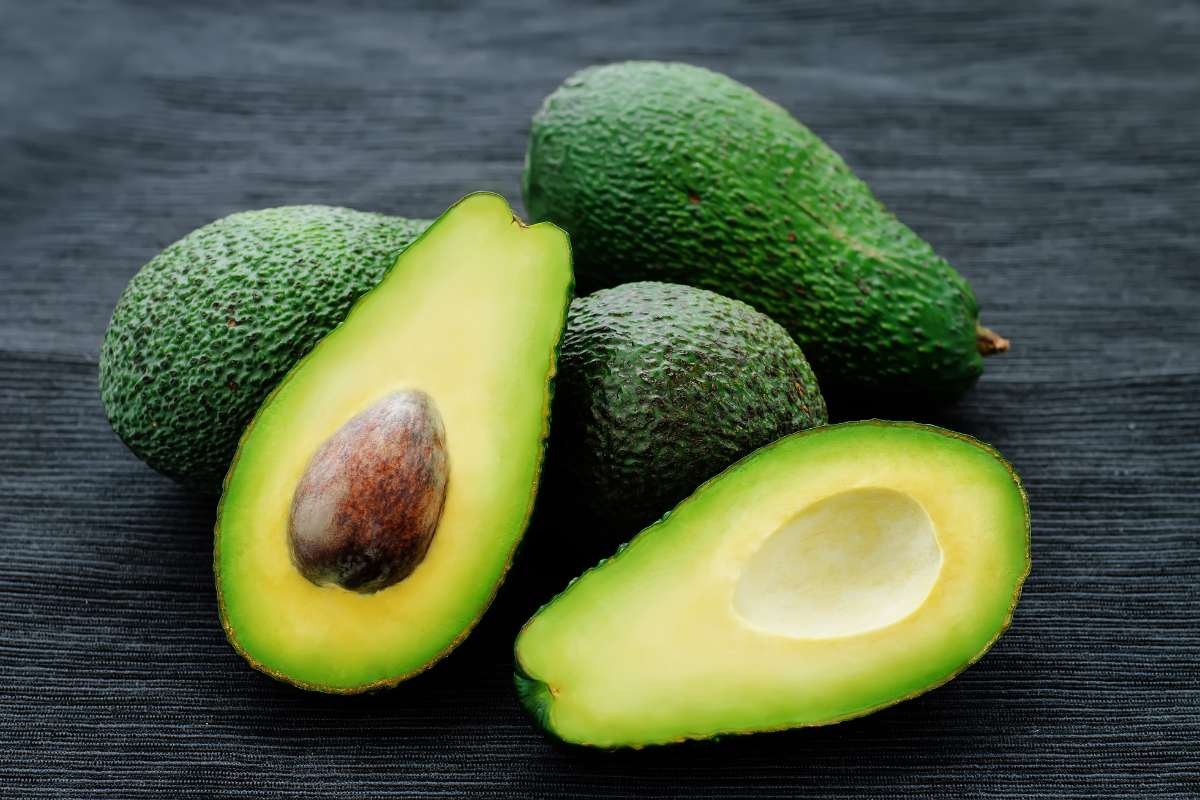
The most well-known use of the avocado has now taken the form of its popularity in skincare and hair care because of its hydrating properties; they contain plenty of healthy monounsaturated fats, fiber, potassium—even more than bananas—and vitamins like B6, C, E, and K. The most modern among all is Avocado Toast, the food trend of the new generation. Have you ever considered putting the avocado pit you have left into your house to produce some beautiful, leafy greenery?
A little time and proper technique will convert an ordinary seed into a lovely indoor avocado tree! If you love gardening or simply like fun DIY experiments, growing an avocado plant from a seed is an exciting project that brings some greenery into your home. However, here comes the snag—although the seed sprouts easily, getting it to sprout into something more impressive than the seed is a different challenge. So, the key is; What do we do? Let’s get to know the step-by-step guide on how to grow an avocado plant from a seed.
Table of Contents
How to grow an avocado plant from a seed?
It’s simple and satisfying to grow an avocado plant from a seed, and with just a little patience and care, you’ll have yourself a wonderful houseplant. Use the following rather simple steps to go ahead and put an avocado plant into growth.
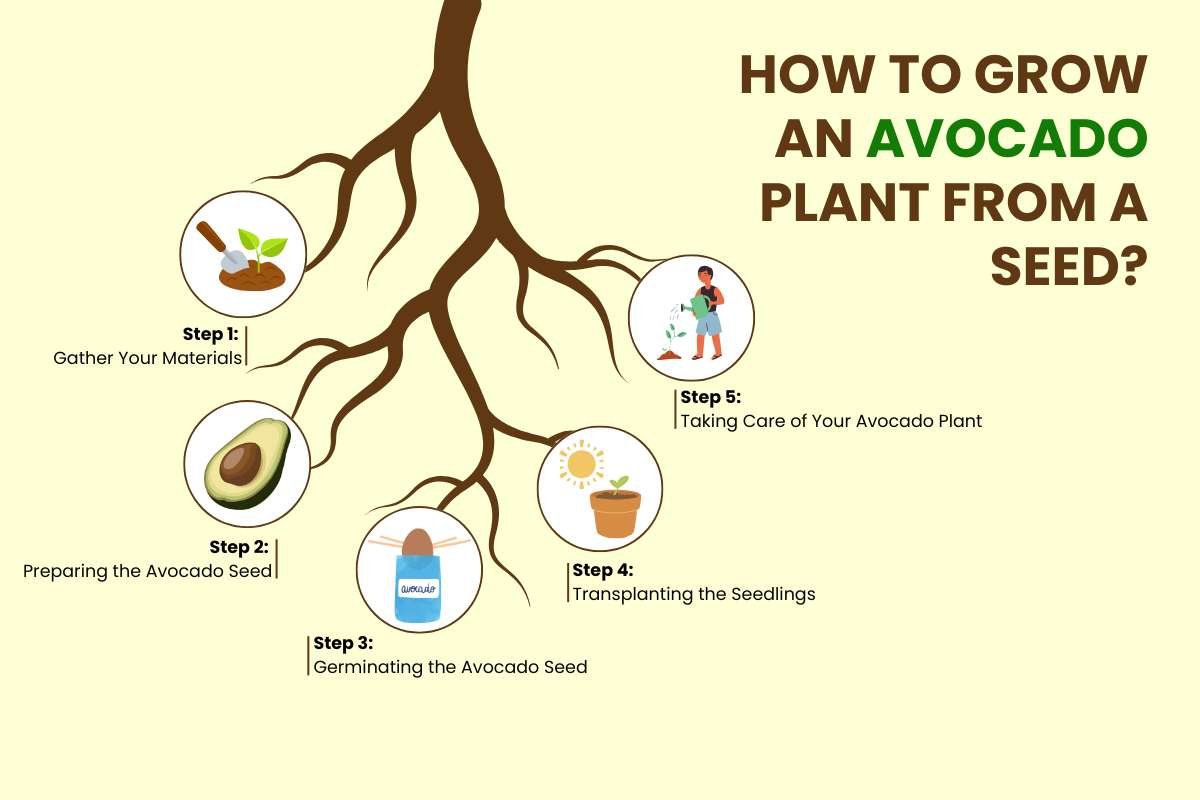
Step 1: Gather Your Materials: Before starting with seed plantation, an individual must have a fresh avocado seed, toothpicks, a glass or jar, water, a pot with soil, and a sunny windowsill
Step 2: Preparing the Avocado Seed: After having the required inventory, carefully free the seed from the avocado without damaging it. Remove all the outer flesh from the seed. After cleaning the seed, it is important to identify the top and bottom sides of the seed. The seed’s top is a little bit pointed; the bottom side is large and flat. This is the part that would go beneath the water for the roots to grow.
Step 3: Germinating the Avocado Seed: To start the germination, jab three or four toothpicks into the avocado seed around its circumference, about halfway up. Suspend the seed on the rim of the glass or jar with the broad end submerged in water. Place the jar in a warm, bright place near a sunny window. Change the water every 2-3 days to avoid mold or bacteria. In 2-6 weeks, the seed should crack, sending roots out of the bottom and a sprout out of the top.
Step 4: Transplanting the Seedlings: Once your avocado seed has established a strong root system with a six-inch sprout, it’s time to move it to soil. Get a pot that is at least eight or ten inches with drainage holes so it doesn’t have water issues. Prepare a rich nutrient soil to be used, ready for planting all of the seeds, with the lower half buried within the soil and the upper portion showing. Water the seed well once planted, and keep the soil watered at a consistent level, but beware not to drown it.
Step 5: Taking Care of Your Avocado Plant: Avocado plant care tips that can help guide you to success:
- Put your avocado plant in sunlight and find a location that receives six hours of sunlight. In case the plant is grown indoors, keep it near the window with maximum sunlight exposure or expose it to grow light.
- Keep the soil moist, but don’t overwater your plant. When the leaves start to yellow, that means you have overwatered it; hence, allow it to dry out before watering it again.
- Pruning helps in the healthy growth of plants. Once it has reached 12 inches in height, prune the top few inches to allow branching for bushiness. Regular pruning also enables you to control its size, especially in the case of indoor plants.
- Fertilization is of utmost importance in the growth of the plant; an organic all-purpose fertilizer should be given every four to six weeks during its growing season in spring and summer. However, limit its fertilizer since it will cause too much foliage with little root development.
How to Fix Yellowing or Drooping Leaves?
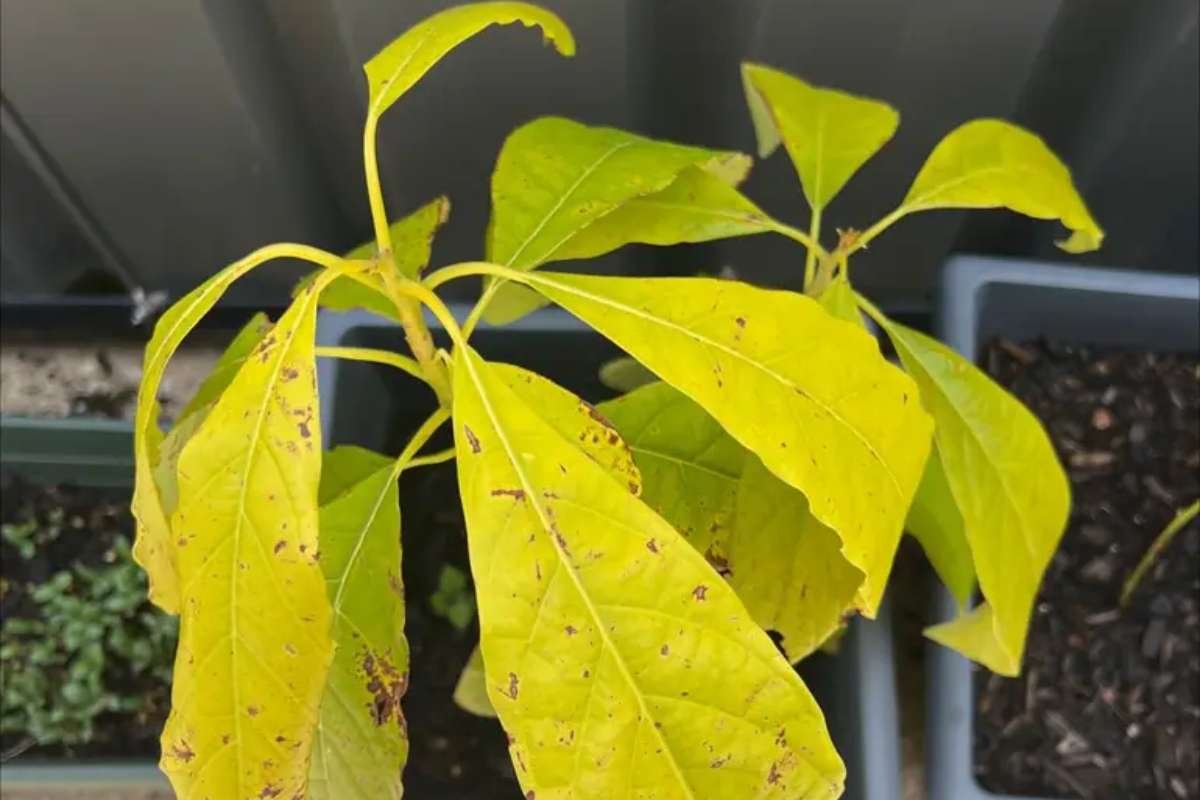
If your avocado plant has yellowing or drooping leaves, it may be overwatered. Check on the moisture of the soil and allow the top inch to dry out before watering it again. Also, if underdone, other kinds of drooping leaves may occur; thus, keep the plant supplied with water without saturating it. Besides, the humidity may be low; that’s why it’s good to mist the leaves or place a humidity tray nearby.
An insufficient amount of nitrogen could present itself through yellow leaves, which can be treated with a balanced fertilizer once every four to six weeks during the growing season. In the case of leaves that appear scorched, this can mean your plant is taking too much direct sunlight; in this situation, it helps to place it in bright but indirect light. Besides this, there is always a question of when to expect fruit from one’s avocado plants.
When Will Your Avocado Plant Bear Fruit?
It is one that everybody seems to have! If your plant is grown from seed, it could be anything between 5-13 years before it bears any fruit at all, and that, too, is not guaranteed! But, if you want quicker and certain harvesting, you may want to consider grafting an active branch from a mature avocado tree into your plant.
Also read: Foods to Eat for Healthy Bones: Strengthening Your Skeletal System
Growing an Avocado Tree Indoors vs. Outdoors
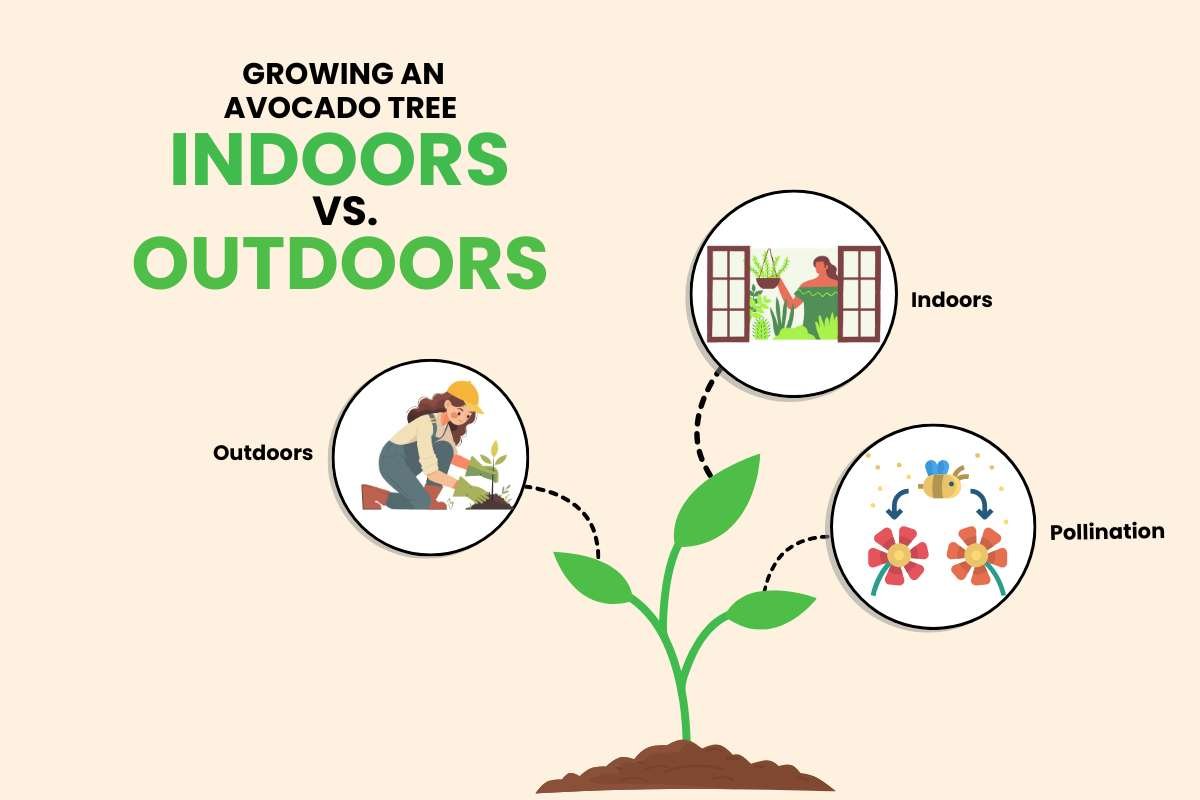
- Indoors: Avocado plants grown indoors usually remain ornamental and rarely produce fruit.
- Outdoors: Trees grown in warm climates outdoors have a higher chance of bearing fruit.
- Pollination: Some avocado varieties require cross-pollination for fruit production.
Conclusion
To learn how to grow an avocado plant from a seed is, in every sense of the words, an interesting and rewarding process. Some people may say that nothing comes easy in this world, and they’ll probably be right because growing a nourishing avocado tree can never be done overnight. With a little information and constant care, you can gradually have this full vigorous green growing in your own and surrounded by your cuddly plushies. With some patience and love, homemo-green avocados will finally be yours.